Thermaltake TH240 ARGB Sync V2 CPU Cooler CL-W361-PL12SW-A


Original price was: £99.99.£75.95Current price is: £75.95.
Thermaltake TH240 ARGB Sync V2 CPU Cooler CL-W361-PL12SW-A Price comparison
Thermaltake TH240 ARGB Sync V2 CPU Cooler CL-W361-PL12SW-A Price History
Thermaltake TH240 ARGB Sync V2 CPU Cooler CL-W361-PL12SW-A Description
Thermaltake TH240 ARGB Sync V2 CPU Cooler: Superior Cooling Performance
Are you ready to elevate your PC’s cooling capabilities? The Thermaltake TH240 ARGB Sync V2 CPU Cooler (CL-W361-PL12SW-A) offers unmatched performance and stunning aesthetics, making it the ideal choice for gamers and PC enthusiasts alike. With customizable RGB lighting, this liquid cooler not only enhances your system’s cooling but also adds a stylish touch to your desktop setup. Discover why this cooler stands out in the crowded market of CPU coolers.
Key Features of the Thermaltake TH240 ARGB Sync V2
- Efficient Water Cooling: Features a liquid cooling method that ensures superior heat dissipation, keeping your CPU temperatures low even during intense gaming sessions.
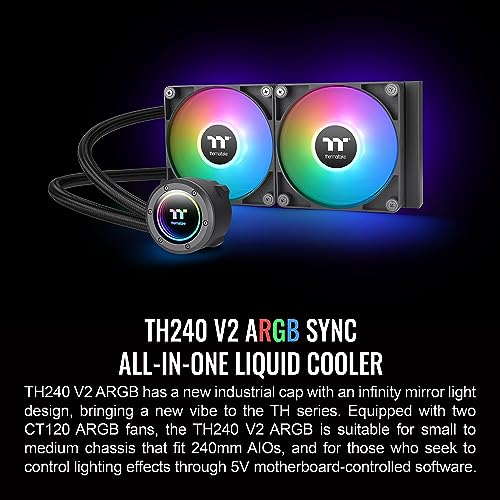
- Stylish RGB Lighting: Customizable ARGB lighting allows you to sync with your build, creating vibrant visual effects that enhance your overall aesthetic.
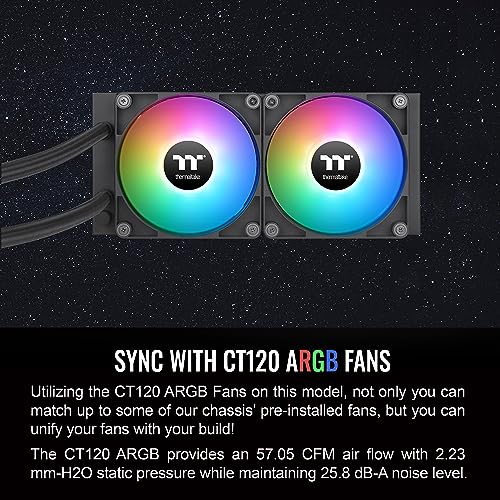
- Optimal Airflow: The cooler boasts a maximum airflow volume of 57.05 cubic feet per minute, ensuring your system remains cool and quiet even under load.
- Compact Dimensions: Measuring 13 x 8.1 x 5.4 inches and weighing only 4.27 pounds, its design makes it easy to integrate into nearly any desktop setup.
- Quiet Operation: With a noise level of just 25.8 dB, the cooler operates silently, allowing you to focus on your gaming or productivity without distractions.
- High Compatibility: Compatible with Socket LGA 1700 and other popular platforms, this cooler fits a wide range of setups, ensuring versatility for different builds.
- Durable Materials: Made with high-quality copper for effective heat conduction, combined with a hydraulic bearing for enhanced longevity and reliability.
- Comprehensive Warranty: Thermaltake offers a 3-year warranty on parts and labor, giving you peace of mind with your purchase.
Price Comparison Across Retailers
The Thermaltake TH240 ARGB Sync V2 CPU Cooler is competitively priced across leading retailers, making it accessible to everyone. As of now, prices range from $99 to $129, depending on the supplier and any ongoing promotions. Our price comparison tool allows you to see the latest offers and discounts, ensuring you get the best deal possible. Don’t miss out on the opportunity to save while upgrading your cooling system!
6-Month Price History Trends
When observing the 6-month price history chart for this cooler, a clear trend emerges. Prices have fluctuated moderately, peaking at $129 during seasonal sales and dipping as low as $99 during specific promotional events. This information can help guide your purchasing decisions, allowing you to buy at the right moment for maximum savings.
Customer Reviews: What to Expect
Our analysis of customer reviews for the Thermaltake TH240 ARGB Sync V2 highlights several key points:
- Positive Feedback: Users frequently praise the cooler’s performance, noting significant temperature reductions compared to stock coolers. The RGB lighting is also a hit, with many appreciating the customization options.
- Drawbacks: Some users mention installation challenges, especially for those unfamiliar with liquid coolers. Additionally, a small number of reviews mention that they experienced slight noise from the pump, although most found it acceptable for the performance gained.
Unboxing and Review Videos
If you want a closer look at what you can expect from the Thermaltake TH240 ARGB Sync V2, several YouTube unboxing and review videos are available. These videos provide visual demonstrations of the cooler’s features, performance in real-world applications, and tips for installation. Watching these can equip you with valuable insights before you make your purchase.
Whether you’re upgrading an existing system or building a new one, the Thermaltake TH240 ARGB Sync V2 CPU Cooler CL-W361-PL12SW-A is an excellent choice for optimal cooling performance and eye-catching design. Don’t miss the chance to compare prices now! Get the best deal on this high-performance CPU cooler and elevate your gaming experience.
Thermaltake TH240 ARGB Sync V2 CPU Cooler CL-W361-PL12SW-A Specification
Specification: Thermaltake TH240 ARGB Sync V2 CPU Cooler CL-W361-PL12SW-A
|
Thermaltake TH240 ARGB Sync V2 CPU Cooler CL-W361-PL12SW-A Reviews (8)
8 reviews for Thermaltake TH240 ARGB Sync V2 CPU Cooler CL-W361-PL12SW-A
Only logged in customers who have purchased this product may leave a review.


A. Rivera –
El problema: la pantalla no es reconocida por el software, pero no es problema de software, es problema físico con la pantalla y la conexión usb. Los foros de TT tienen muchas personas comentando el mismo problema y a ninguno le han dado una solución.
De las pocas personas que pidieron un reemplazo solo a una le funciono su nueva unidad, entonces no vale la pena intentarlo.
Yo pedir reembolso y comprare una marca distinta.
Craigc –
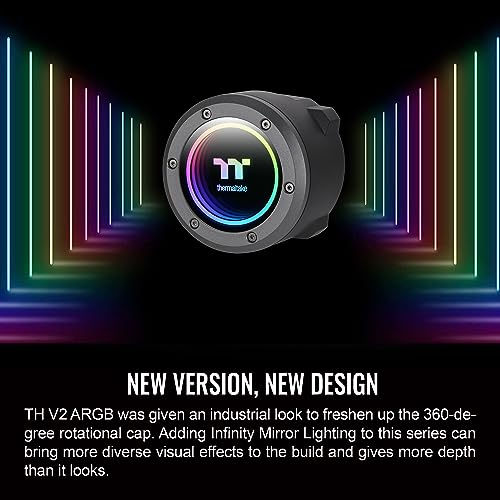
The Thermaltake cpu cooler logo is able to rotate 360 degrees which is a very nice feature compared to the V1.
Red Star Haze –
I am using an i7-4700K in a Mini-ITX case, and this AIO keeps my CPU very cool. The TT RBG plus app allows you to replace the stock images on the AIO screen with your own stills or even GIFs.
Red Star Haze –
Anther Update: Just got the 280V2 This is my third AIO from TT and obviously I like them!
The 280 was able to keep my 14700k down to 80c at 100% sustained load. The great surface area and lager fans do a great job of cooling. I havnt decided if I like the new LCD on the pump as it is not quite as bright as the LED version, but it is a larger pump and performs great. Fan colors are decent, but more importantly they cool the radiator. I am using a pull configuration exhausting the heat for best results.
UPDATE: I have gone through quite the upgrade process. I originally got the 120 AIO as it was the only one that would fit in my case. the 120 worked very well, but my temps were still a little high on this 13700k, so I decided to get the 240 since my case supports it now. I got the same brand since IO was happy with the 120 and all the mounting brackets are the same. I left my two fans in the front of the case and decided on a pull configuration. Had to rewire 3 fans and the new pump so that took a while re doing the cabling. And then figuring out which way to orient the pump to minimize the stress on the water lines. Initial testing was great with Idle temps between 38-41 and peak temps of 81. After putting all the side covers and front panel back on I got idle temps around 45 and peak temps between 86-90. I wasnt getting much airflow out the front of the case so I took the front panel off and for now am leaving it off. I am back down to idel 37-38 and peak temps of 81-85. So I have reduced both my idle temps by about 6 degrees and peak temps by 15-20 degrees. And this AIO is super responsive as the watts come down the temps come down. I also did play with all of my fan settings for the pump and fans. I happen to use the stair instead of slope and also have the fans running at a higher percentage than the pump up until about 55 degrees to IMO keep the radiator as cool as possible. If you have room in your case the 240 definitely works better than the 120. I think the brand is good and both these pumps work great.
As a side note, before I upgraded to the 240, I ran a tube from my window AC into one of my input fans and near the back of the case where the radiator was. It made the radiator cold and all my internal temps were in the 20’s and my high temp was around 60. I havnt tried that with the 240 yet. With everything so low in temps I gained 1000 points on my CPU benchmark. 🙂
ORIGINAL REVIEW: Lots of parts, not the greatest of instructions, but does a great job of cooling down the hot running I7 13700k processor. I had a little trouble getting the radiator to mount in place of my rear fan, so I ended up using the fan to pull across the radiator instead of pushing through it. My case just wasnt quite big enough for the radiator to replace the old case fan. I mounted the radiator first so I could figure out the best rotation of the pump to minimize any pull on the hoses. It would have been a lot faster had the radiator fit perfect, the mounting holes were a bit off from my case, but I just used 2 screws diagnol to mount it securely. This is my first water cooled system, so I was pretty leary of any leaks and still probable a little shy about having water in my case. But, my new processor was running so hot that I had to do something and thins was easier to install than some of the air cooled options and even cheaper. I dont have room for a 6″ tall heatsink and fan and this fit the bill. Performance wise, I ran several CPU benchmarks and peaked at 95 c for a split second before it dropped below 60. The bulk of the CPU stress test, was around 60. The unit kicked in quickly and brought my temps down just as fast. Idle temp is around 41. As a bonus, my CPU mark actually increased anywhere from 900-1300 over what I was getting prior to this install. Basically I roughly went from 43000 to 44000 just by installing this unit. Honestly, I can probably squeeze more out of it because I had several background tasks running that I normally shut off. The power are all 3 pin not 4 and I am still not 100% sure of which MB plugs to use. I plugged the fan into the cpu fan header and the pump into the cpu pump/fan option header, but I also have another pump header on the MOBO. So IDK. The RGB lights plugged into my 4 pin on the MB and worked. I didnt test the included remote nor did I play around with the lighting. I was mostly concerned about the heat situation, which this thing rocked. There is an insane amount of wire length for the Lighting connections.
Overall, this thing is great, does a great job of cooling and is quiet.
Super cute! –
This unit works perfectly, and it drops the temperature radically.
I installed the 360mm version in my media server this morning and then ran the Intel Processor Diagnostic Tool to see how it fared.
SERVER INFORMATION:
Intel i7 4790k processor
ASRock Z97 Extreme 6 board
16 GB Ripjaws PC3 12800 RAM
Corsair RM850X power supply
MSI GeForce GTX 1070 video card
10 hard drives (9 internal and 1 external)
Pioneer BDR-209DBK Blu-ray drive
Thermal take Water 3.0 Triple Riing RGB 360 water cooler
PERFORMANCE:
— IPDT64 – Temperature Monitor Results
— Temperature Test —
…
Version 1.0.12.64b.W
…
57 degrees C below maximum
Test Result – PASS
Expected Greater than 1 degrees below max
Received 57 degrees below max
This result is amazing, and I cannot say how happy I am with it. The cooler was purchased for my media server that is used for transcoding 1080p video. Before adding this cooler, I could get over 200F when transcoding multiple streams with the processor NOT overclocked. This was unacceptable, so I sought out a better solution. With this cooler, my maximum reading (on only one core) has been 170F when transcoding multiple streams AND overclocking the processor to 4.7ghz.
I have been stress testing the server this whole afternoon with the processor overclocked and the temperature has never gotten above 176F. This result was with all cores of the processor pegged to maximum.
INSTALLATION:
Installation is not terribly difficult, but it does take a bit of time. You will need to remove the fans from the top of your case, to prepare for the install. The radiator comes without the fans attached, so you can choose to push or pull air through it. You will need to attach the fans to the radiator, then I would recommend installing the radiator to the case before connecting the pump to your processor. Attaching the pump to the processor is simple, as the unit comes with clever brackets that can be configured for basically everything. You will attach a backplate on the back of your motherboard; it attaches with sticky tape. You will need to choose the proper ring for either Intel or AMD, then follow the directions for setting the width of the screw holes. Select the proper thumbscrews for your processor, and press them into the holes on your connector ring. Once you have the connector ring set up for your processor, remove the protective cover from the pump and carefully attach it to the connecting ring, then put the locking ring over it to secure it in place. The pump comes with thermal paste already properly applied to the face, so you can now put the pump up in place, locating the screws into the screw holes in the backplate and screw the pump down securely. Simply connect the pump to your CPU fan connector, connect the light/fan controller to another CPU fan connector on your board, then connect the fans to the controller.
This process took me about 20 – 30 minutes, as I was careful, and took my time. You should be able to do it in about the same time if you are careful… faster if you are in a hurry. 🙂
I cannot recommend this cooler highly enough.
FIVE STARS
Super cute! –
Title: Thermaltake Fans: A Winning Combo of Performance and Aesthetics
Rating: ★★★★★ (5/5)
I recently upgraded my PC with Thermaltake fans, and I am thrilled to share that they have exceeded my expectations on both performance and aesthetics. These fans not only keep my system running cool but also add a visually striking element to my PC setup.
The standout feature of the Thermaltake fans is their exceptional performance. They effectively dissipate heat, ensuring that my PC maintains optimal temperatures during extended gaming sessions or resource-intensive tasks. The airflow is impressive, contributing to a noticeable improvement in overall system cooling.
Beyond their functionality, these fans bring a touch of style to my PC. The design is sleek and modern, complementing the aesthetics of my gaming rig. The LED lighting adds a dynamic and eye-catching element, creating a visually appealing showcase within my PC case. The customizable lighting options allow me to personalize the look, enhancing the overall ambiance of my gaming setup.
Installation was a breeze, thanks to the user-friendly design and clear instructions provided. The build quality of the fans is robust, and they operate quietly, contributing to a more enjoyable gaming experience without unnecessary noise disruptions.
The Thermaltake fans have proven to be a valuable investment in terms of both performance and aesthetics. The balance they strike between cooling efficiency and visual appeal makes them a top choice for anyone looking to enhance their PC setup.
aaron ngo –
Fonctionne très bien
A. Rivera –
Muy buen enfriamiento líquido, mantiene mi procesador a muy buenas temperaturas