Body solid Multi-Station 210lb Dual Weight Stack Machine
Body solid Multi-Station 210lb Dual Weight Stack Machine Price comparison


- All prices mentioned above are in United States dollar.
- This product is available at Cazaar.co.uk, Aosom.co.uk, Tesco Stores, OnBuy.com, Debenhams.com, Manomano.co.uk.
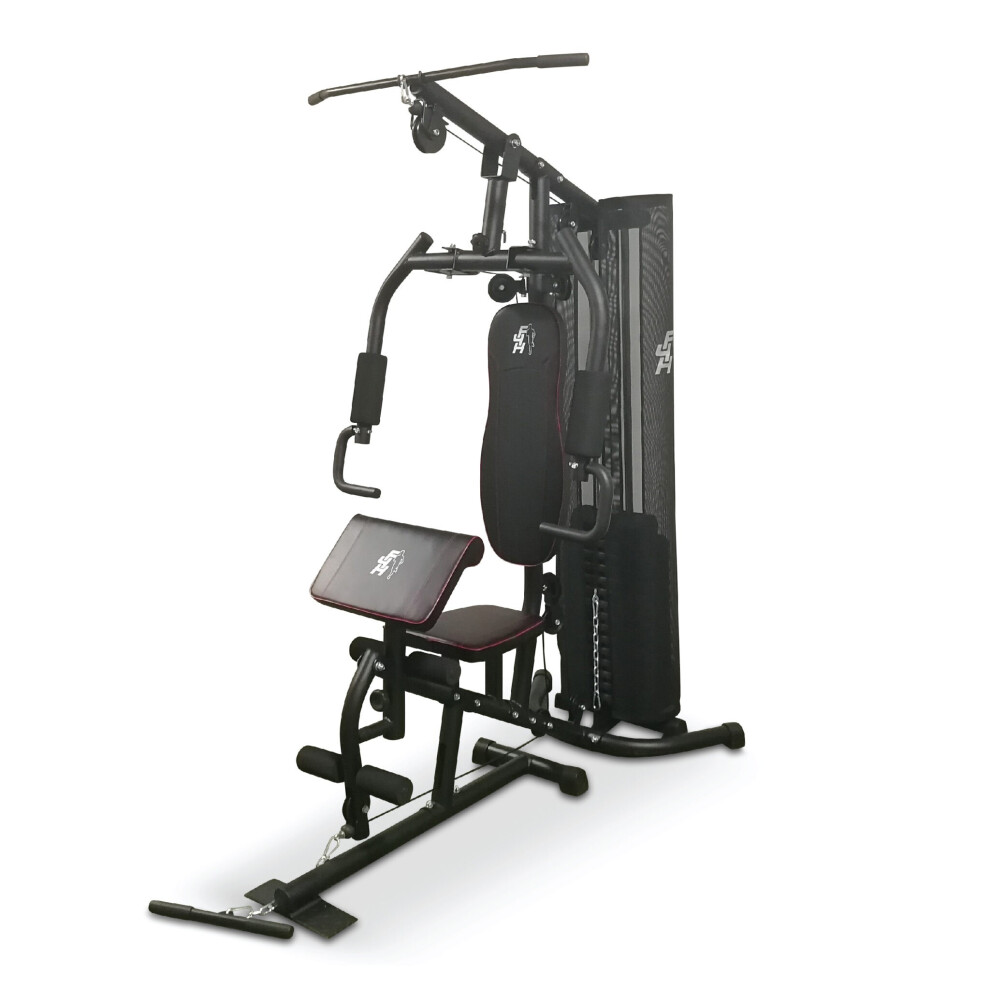
- At cazaar.co.uk you can purchase MHSTAR UK LTD HOMCOM Multi Gym with Weights, Multifunction Home Gym Machine with 45kg Weight Stack for Full Body Workout and Strength Training for only $339.98 , which is 79% less than the cost in OnBuy.com ($1,643.27).
- The lowest price of Fit4home Home Multi Gym 80kg Weight Stack Compact Exercise Machine was obtained on October 11, 2025 14:33.
Body solid Multi-Station 210lb Dual Weight Stack Machine Price History
Body solid Multi-Station 210lb Dual Weight Stack Machine Description
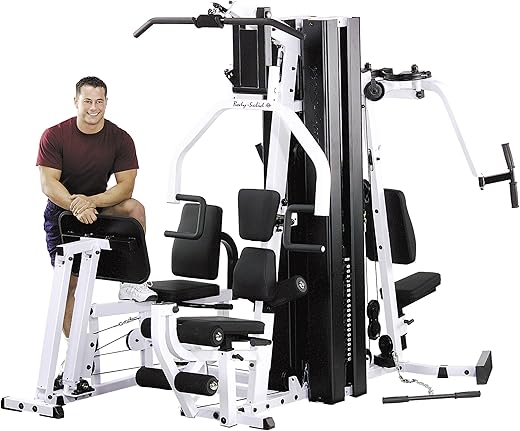
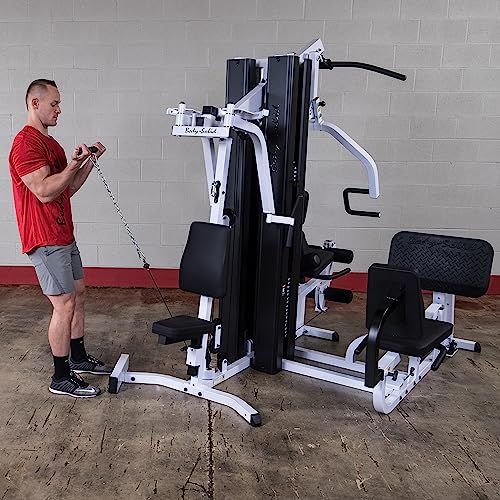
Body Solid Multi-Station 210lb Dual Weight Stack Machine
Experience gym-quality workouts at home with the Body Solid Multi-Station 210lb Dual Weight Stack Machine. This versatile exercise equipment combines various strength training features into one compact unit, making it perfect for fitness enthusiasts who want to maximize their workouts without sacrificing space. With this machine, you can efficiently train multiple muscle groups, enhancing your overall strength and fitness level. Invest in your health today and discover the benefits of a complete home gym experience!
Key Features and Benefits of the Body Solid Multi-Station Machine
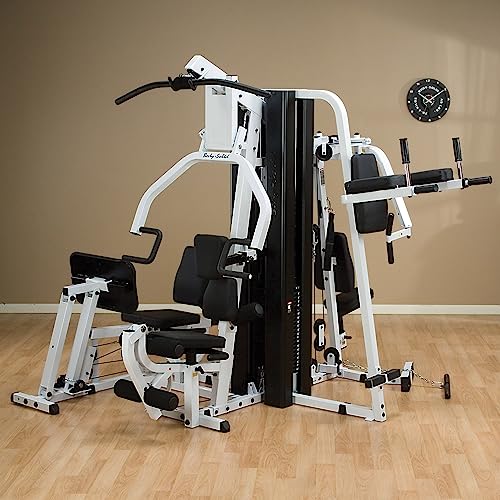
- Dual Weight Stacks: With a maximum weight resistance of 210 pounds, this machine provides ample options for strength training. Enjoy flexibility in your workouts, targeting different muscle groups effectively.
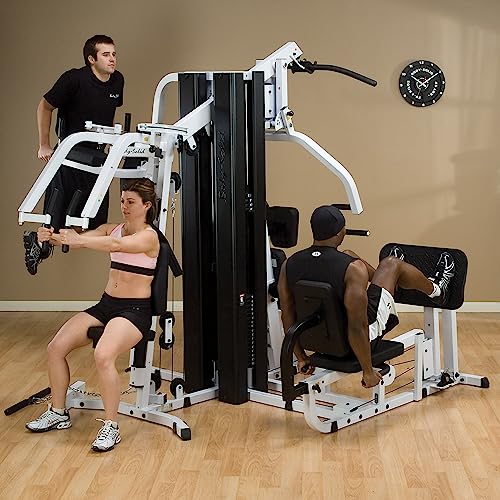
- Multiple Stations: The Body Solid Multi-Station features various handles including pulldown and fixed handles, allowing for diverse exercises such as lat pulls, tricep extensions, and leg presses.
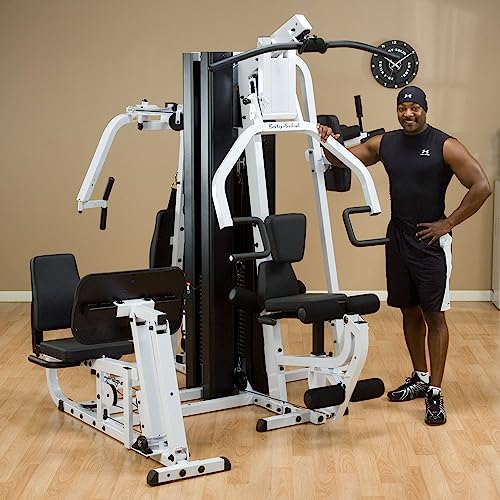
- Durable Construction: Built from high-quality materials, this gym equipment is designed to withstand intensive use. The machine has a robust frame with a lifetime warranty on the frame and all parts.
- Compact Design: Measuring 90 inches in depth, 82 inches in width, and 83 inches in height, this machine fits conveniently in home gyms while offering an extensive range of workouts.
- Commercial-Grade Quality: Ideal for home or commercial gym settings, this machine guarantees durability and reliability for long-lasting use.
- Easy Assembly: The Body Solid Multi-Station arrives with straightforward assembly instructions to get you started on your fitness journey in no time.
- Warranty: Enjoy peace of mind with a comprehensive warranty covering the frame for a lifetime, ensuring you’re protected from any potential defects.
Price Comparison Across Various Suppliers
The Body Solid Multi-Station 210lb Dual Weight Stack Machine offers competitive pricing across different suppliers, making it easier for you to find a deal that fits your budget. You can expect the price range to hover around $2,500 – $3,000, depending on the seller and any applicable shipping costs. Use our price comparison tool to ensure you’re getting the best value and monitor the price fluctuations to grab the best deal!
6-Month Price History Analysis
Reviewing the 6-month price history of the Body Solid Multi-Station reveals noteworthy trends. The price has seen a steady decline over the past few months, with minor fluctuations that are typical for fitness equipment. This trend indicates a potential opportunity to purchase this machine at a lower price, especially when seasonal sales occur. Keep an eye on our price history charts for the best time to buy!
Customer Reviews: Pros and Cons
Customers have praised the Body Solid Multi-Station 210lb Dual Weight Stack Machine for its all-in-one functionality and robust build. Many users highlight:
- Quality Construction: Reviewers frequently mention the high-quality materials, emphasizing its longevity even with heavy use.
- Variety of Exercises: Users appreciate the multi-functionality that allows a comprehensive workout in one unit.
- Space Efficiency: Many appreciate how this machine fits into their home gym without taking up excessive space.
However, some customers have also pointed out a few drawbacks:
- Assembly Complexity: A few users found the assembly process challenging and time-consuming.
- Price Point: While most agree on its value, some users feel the cost is on the higher end for home equipment.
Explore YouTube Review and Unboxing Videos
To further your understanding of the Body Solid Multi-Station 210lb Dual Weight Stack Machine, we recommend checking out several detailed unboxing and review videos on YouTube. These videos provide visual demonstrations of the machine’s features, functionality, and assembly process, helping you make an informed decision before purchasing. Discover how this equipment can transform your at-home workout routine!
Act Now and Elevate Your Fitness Game
With its durable construction, versatility, and user-friendly aspects, the Body Solid Multi-Station 210lb Dual Weight Stack Machine is an excellent investment for anyone serious about their fitness goals. Don’t miss out on the opportunity to enhance your strength training regimen.
Compare prices now!
Body solid Multi-Station 210lb Dual Weight Stack Machine Specification
Specification: Body solid Multi-Station 210lb Dual Weight Stack Machine
|
Body solid Multi-Station 210lb Dual Weight Stack Machine Reviews (3)
3 reviews for Body solid Multi-Station 210lb Dual Weight Stack Machine
Only logged in customers who have purchased this product may leave a review.


LiveItAs –
First off…I love this home gym. It’s solid, well built heavy duty and the heavy steel frame makes for such a quality gym. I was familiar with body solid products because I owned a smaller unit without the leg press a few years ago so I had no hesitation in buying another one. Once the gym is all put together it’s a fantastic machine. It looks it too!! Now the downside…assembling this is painfully slow and tedious! There are lots and lots of parts you need to figure out where they go and what bolt you need for that part. It took me 4 days to assemble. Now I’m not wylie coyote super genius but I’m not Elmer Fudd either!! I had a difficult time following the blow up diagrams. There are no directions at all. There is nothing that says take part xyz and attach to part abc using 3 inch bolts. Noting at all like that. It’s all blow up diagrams and you need to study them constantly!!! It got annoying and somewhat frustrating very quickly. The build directions are just detailed schematics and it’s very easy to get confused with looking at a small detailed diagram. Just read the other reviews. Many people complain about the assembly. With that said…it’s a great machine. It’ll probably outlast me and it’s still worth the money and time to build.
Kindle Customer –
This system is fantastic for the home gym. High quality, operates very smoothly, and covers everything top to bottom especially when you add on the Vertical Knee Raise.
We installed it in our basement on (4) horse stall mats which left the perfect footprint for this to be on…….8 feet by 12 feet. We just started using it and am amazed with the amount of exercises this provides. Will never need a gym membership again. Love the convenience!
Now lets talk about the directions. Ummmmmmm…..what directions! Some sketchy diagrams do not count. But 20 hours later…..we figured it out. It takes two people……sometimes just to think it through. Some suggestions:
Take the time to unpack EVERYTHING and lay it out per station…..sort it…….sticky tag it with the part piece.
Sort all the hardware into bags and mark on the bag the part piece.
Note each station has a red, blue, or yellow dot and tend in general to be packed station by station.
Note the dots tend to be on the “up” side of the piece.
Print out the directions from Body Solid website on 11 x 17. Easier to see than the provided 8 1/2 x 11.
Note the page numbers on the directions. Install in this order.
Print out all the photos in different orientations you can find. Will be very helpful.
For the cables, run everything then tighten the nuts/bolts. If you start by tightening the nuts/bolts for the pulleys, you will have to undo some of them to get the cables in.
Don’t forgot to check to make sure there are not plastic end caps or levelers needed under a piece. We did that, then had to find a way to life it to get them under there. Not fun.
And……bring patience! We took our time and worked on it in the evenings for a few hours till it was done. 100% worth it and I find it helps me understand the machine better and the possibilities for workouts.
Kindle Customer –
This Gym is the real deal! Solid and built with no compromises! Some have complained about the instructions, but I think they were sufficient with diagrams that show how it all goes together. A picture is worth a thousand words, and if you tried to explain how to put this size of a project together by worded instructions, you would definitely confuse some people, especially if it were done by someone with ESL language skills. Second, you would need a lot of wording and that in itself would turn a lot of people off. The diagrams are simple and you need to study them carefully while assembling the gym. Here is my experience and advice if you want to put this thing together like a pro. My wife was telling me to hire someone, but I’m glad I didn’t. You will have a much better understanding of this gym if you do it yourself. It’s not too hard, but it is a big project. So you need to take your time and work carefully and not expect to put it together in an hour or two. Save yourself a couple hundred bucks!
I needed to put this thing in a room that is 10.5 feet by 12 feet. Not a very big space for this equipment. I already had a tread mill, stair climber, and an inversion table in the same room, all of which I wanted to keep. After looking at all the pictures of the EXM3000LPS gym online of all the different stations on this gym, I decided to put my existing equipment in the corners of the room and the gym positioned in the center so that the gym and my other equipment wouldn’t interfere with each other. Not being too sure of the outcome, I assembled the gym so that it would be able to re-position the gym if there was going to be any problem. If you face a similar problem of not knowing how exactly you want this gym to be positioned, then you need to follow the order outlined below so you can move the gym before it becomes too heavy.
First, unpack all the boxes that come. Get the instructions (diagrams & parts list) and look them over good. Each part has an identifying letter and number on the parts list, and the corresponding part letter and number labeled on the assembly diagrams. But the parts themselves are not labeled except for colored stickers on some parts that show which section of the frame they are on. Also note that the instructions mention that you have 10 days from the purchase date to register your purchase for warranty service. If you are not ready to put this thing together right away, I suggest you open the boxes to get the registration paperwork and get that done. Not sure whether they would give you any trouble if you were late, but that’s what the instructions say.
So get a roll of masking tape and a fine marker, and unpack all the parts, bolts, washers, frame parts, and identify them and place them in like groups and check the numbers. Measure the diameter and length of bolts and stick the masking tape and identifying letter and number on each group of same parts. One issue I had was there were two parts that I didn’t find, which hold in some round foam pads. I thought they were missing, however, during assembly I found that these two parts were replaced by a single part which goes into the end of a 1″ pipes and holds the foam in place. But here is a note of caution: There are actually two parts shown on the parts diagram which have the same exact description, “01” ROUND ENDCAP” but the part numbers are not on the parts. The only way to tell the difference, which is that one has a slightly larger diameter than the other, is to stack them together so that the larger diameter part is noticeable. I made the mistake of forcing the larger part into the smaller hole and then was left with a part that wouldn’t stay in because it was in the wrong location. And the first part was forced in to where I would have to destroy it to take it out. The smaller part goes on 1″ pipe on the frame and there are two, the larger parts go for the knee bends and there are 4 of them. The pipe welded to the frame have a smaller hole than the knee bend pipes. The foam pads are all the same that are held in by these parts.
After you have identified all the parts and have them neatly laid out around the room where you are assembling this gym, then work on getting the frame together first. DO NOT assemble the weight stacks or any cables and pulleys, leave them for last. Put together all the main frame parts and if you need to adjust the position a bit this way or that, you will be able to push and adjust the gym. But once the weight stacks are in, you cannot move this gym. On the top of the gym where the weight stack poles attach, you can put the bolts in to hold the system together, but do not tighten them until you have assembled the rest of the frame and then put the weight stacks in and tighten everything up.The last thing to do is to assemble the cabling and pulleys. Trust me, you will have to remove cables and pulleys if you try to install them too soon. Take a little time to properly identify the cables. Just like the rest of the parts, the parts themselves are not labeled. But you can determine which ones are which based on the ends, lengths and other details of each cable. And once you have everything else assembled, you can understand which cable is used where better, and they are shown on the diagrams. All the pulleys are the same, except one.
Don’t make the mistake of assembling everything on each diagram in the diagram page order before proceeding to the next. Instead, assemble the frame first, then the seats and all other parts, then the weight stacks, weight stack covers, and last the pulleys and cables together.
I also had an issue with one of the pulleys rubbing on a weight stack cover. I could not adjust anything to give it more clearance so I adjusted the hole in the cover to move the it 1/4″ away from the pulley and it is fine. Not a big deal nor any compromise in functionality at all. But I want it to be quiet and something rubbing would bug me.
You could put this thing together in a day if you begin early and work hard at it. But I assembled it over several days and took my time and enjoyed seeing it come together. It is such a good quality product, I didn’t mind assembling it at all. And when it’s all done, you know all about your gym.
As far as the end cap that I forced in the wrong place, I contacted Body Solid and they sent me 4 replacement parts. The customer support is excellent from Body Solid.
One other issue was that the weights on the weight stacks were sticking on the vertical bars that hold the weights in place and guide them up and down. This was solved by applying a little silicon lubricant, like the kind you use on a treadmill, to the polls. That made everything work smoothly. Don’t use grease or oil since there is plastic bushings inside the weights.
I attached some photos of how my gym fits with my other equipment, and also a comparison photo of the two end caps that look alike and how to tell them apart. The room is 10.5 feet by 12 foot but my wife and I can use all my equipment without any problems. The inversion table folds up against the wall, the treadmill is near the ab station, and the stair climber is in front of the leg press. We even have room for a chair to change shoes on.