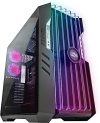
Cooler Master HAF 700 EVO E ATX High Airflow PC Case Price comparison
Cooler Master HAF 700 EVO E ATX High Airflow PC Case Price History
Cooler Master HAF 700 EVO E ATX High Airflow PC Case Description
Highest Long-term Quality & Durability
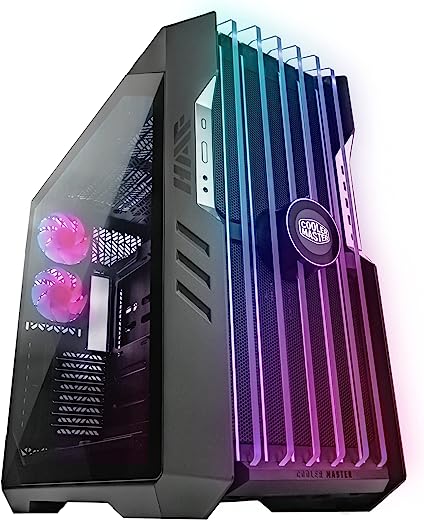
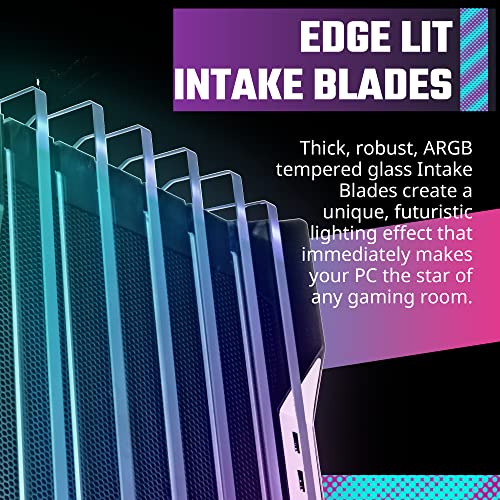
The Cooler Master HAF 700 EVO E-ATX High Airflow PC Case provides users with optimized long-term quality. With its customizable durable steel construction, it provides a sleek and clean look with an easy-to-wonk-on design. It also features a breathable TB front panel for optimum airflow and a rugged look. All the panels are made with durable steel alloys that resist scratches and dents without compromising quality. Its ARGB fan hub can sync up to eight compatible devices giving users a vivid and colorful experience.
Unique & Smart Design for Enhancing Airflow
This PC case is designed with a unique combination of a removable fan tray to ensure optimum airflow through the chassis and a fully adjustable top panel for better system management. The included 4x140mm fans provide maximum air intake while the built-in fan hub connects up to eight ARGB fans for better customization and control. It also comes with a removable side panel, allowing for easy access and maintenance while providing an unobstructed view of the interior components.
Integrated Customizable LCD & ARGB Effects
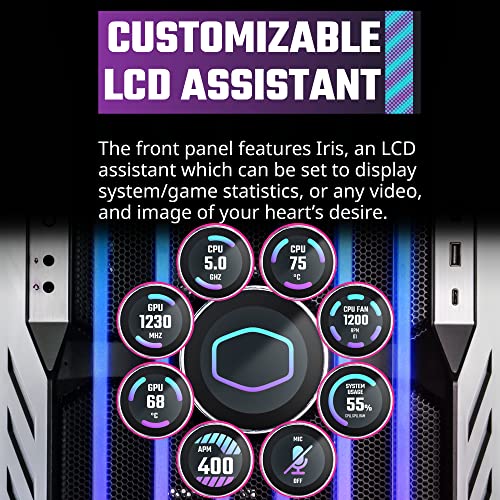
The Cooler Master HAF 700 EVO PC case features an integrated customizable LCD for displaying system performance and vital system information. Its IRIS integrated customization technology enables real-time monitoring of system performance including fan and lighting settings. The included ARGB controller allows users to customize the lighting effects of their PC using their own unique effects. This makes the case look even more stunning due to its impressive lighting and design.
Simple Installation & Easy to Upgrade
The Cooler Master HAF 700 EVO PC case is designed for easy installation and upgrades. It has multiple PCI-E slots for adding hardware and is compatible with most aftermarket cooling solutions. Its large interior makes it easy to install components such as graphics cards and CPU coolers, while the removable side panel makes it even easier to add components without disassembling the entire PC. It also allows for convenient installation of liquid cooling units with easy-to-access mounting points.
Features:
– Durable steel construction
– Breathable TG front panel
– ARGB fan hub connecting up to 8 compatible devices
– 4x140mm fans for maximum air intake
– Integrated customizable LCD
– ARGB controller for custom lighting effects
– Removable fan tray for optimum airflow
– Easy installation and upgrades
– Compatible with most aftermarket cooling solutions
– Easy access mounting points for liquid cooling units.
Cooler Master HAF 700 EVO E ATX High Airflow PC Case Specification
|
Cooler Master HAF 700 EVO E ATX High Airflow PC Case Reviews (7)
7 reviews
Only logged in customers who have purchased this product may leave a review.



Anonymous User –
I’m NOT a fan-boy or a paid shill. I’m just a guy that likes to build computers. I was searching for an extremely large case for a water cooling build with a full size E-ATX (12″x13″) server motherboard (SSI-EEB) I had already purchased 2 large format cases and returned them both due to poor engineering and design. (TT Tower 500 and a Cougar) After 2 failures in a row, I bought this CoolerMaster 700 HAF with a good bit of anxiety.
I’m absolutely amazed.
The first thing that stood out was they actually put thought into removing this behemoth from the packaging box. It’s big, bulky, and very heavy. You can’t simply slice open the top of the box and yank it out of there. It’s a beast. CoolerMaster (CM) designed the box with 4 little squeeze tabs at the base. You slice the top tape and then pinch to remove each of the 4 little squeeze tabs around the base of the box. Then you simply slide the box up and away from your new case. Talk about EASY!!
The next thing that shocked me was how easy it was to remove both side panels. There is a single thumb screw in the back of the case, at the top. You remove that with your fingers, and then slide the top part back about 1 inch. The side doors pop off with a gentle tug and the entire top comes off if you slide it all the way back and lift up. At that point, the case is wide open for your build. No tools!! The top part is held in with the thumb screw and the doors snap into place with metal clips in the case. The side doors go back on just as easily.
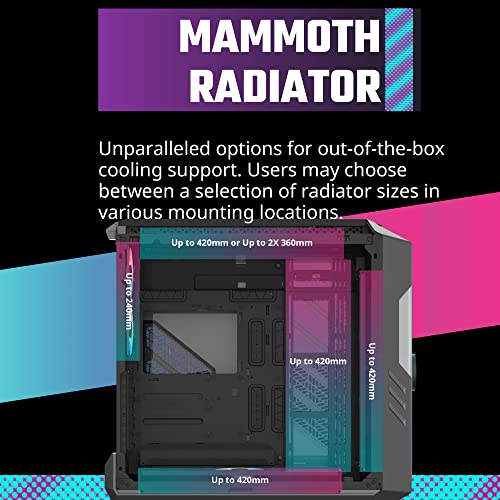
As I said earlier, I’m building a massive server board with a bunch of water cooling. I’ll have (5) radiators in this thing and it will hold them ALL. It has room for dual 480mm rads on the top and a 360 rad in the front as well as the bottom. It also has clear room for a 240mm in the back and I think I could stuff a couple tall skinny rads here and there. It has room for at least 3 good size pump/res combos or plenty of room if you wanted to separate those parts out and hang your reservoirs up high with pumps spread across the floor. You could get 4 pumps on the floor easily….. and that’s just the front side. It has brackets for mounting your pumps and reservoirs too. They remove with a simple twist of the thumb lock. No tools.
It’s a massive case and built for anything you can throw at it. As such, it comes with a giant rack for your HDD. I’m not using those at all so I don’t need this rack. I’m using dual NVME on the MB for my OS, and quad 2.5″ SSD for storage. I wanted the HDD space to mount a pump/res combo. It comes completely out with a simple thumb press on a metal tab!! 2 seconds and it’s out. No tools! Giant hole for almost any other type of hardware you can imagine. Awesome.
CM includes a single 360mm radiator bracket. It’s in the bottom of the case but removes with a simple twist of a thumb tab. Again, tool-less removal and installation. I got to looking around inside the case and discovered that if you don’t want that 360mm radiator on the floor of the case, you can flip it over and mount it into the top or the left side!! (maybe you want pumps and reservoirs down there?) How cool is that?!?! They made the case with the right slots and tabs so that you could move the 360mm radiator bracket into any of 3 different positions inside the case.
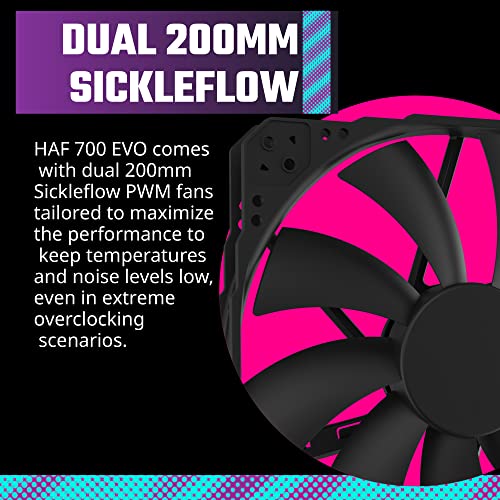
It does come with 5 fans. There are (3) 120mm fans (back and rad bracket) and (2) of their 200mm fans in the front. It does come with 2 different RGB/PWM control boards. I’m not sure how that will work with my SSI-EEB server MB since I don’t have RGB headers. I do want to try and work with it, but I’m prepared to rip it all out and replace with a Razer system. I’ll have to wait and see what happens when I get that far into the build. It DOES have the stuff in there if your MB is compatible.
It also comes with a plastic case for the included hardware, and there’s a LOT of it.
I’m just super impressed. It’s clear to me that CoolerMaster actually put thought into the design. It’s all modular. It all makes sense. Stuff lines up and is put together in a logical manner. 5 stars across the board. Way to go CoolerMaster!!!
Luis Fernando Aguiar –
ThIs is the HAF 500 NOT the H500 as it says. SCAM!
Tavo Fajardo –
Produtos da Cooler Master são os melhores e não poderia ser diferente com o H500M
Tavo Fajardo –
The media could not be loaded.
Enfin un bon boîtier par Cooler Master! Ça faisait longtemps!
Côté qualité, je suis très satisfait. Très content de voir qu’une version a prix acceptable soit apparue. J’aime beaucoup la version EVO de ce case mais rien qui justifie un prix de plus de 800$+++. À 390$ pour celui ci, c’est beaucoup plus raisonnable.
La différence entre les deux versions est simple. Première chose, l’avant. Le boîtier ci, est simplement fait de “mesh” sans le module pour afficher les températures ce qui permet d’avoirun meilleur airflow. Ensuite, il n’a pas le miroir de 360mm qu’on peut mettre sur le côté de la carte mère ou dans le fond. Dernière chose est le riser cable et le support vertical pour carte graphique. A mon avis ça devrait être inclus avec un case à 400$ mais bon. C’est 160$ de plus à investir pour avoir le riser cable et la carte graphique installé à la verticale. J’ai inclue une photo qui montre leur nouveaux support. On peut retirer une petite partie, ce qui permet de l’installer us haut et ça peut donner plus d’espace pour un radiateur.
Pour ce qui est des possibilités de build dans ce case, on a énormément d’options. Possible d’avoir 4 radiateurs à la fois avec tout l’espace que nous avons. Au plancher, il est possible d’avoir un radiateur 40mm avec une config push/pull en même temps qu’avoir la GPU verticale. Si on va plutôt avec une GPU horizontal, un radiateur 60mm en P/P est possible. Au plafond, on peut avoir 2 × 360mm comme radiateur. Un, peut être 60mm en P/P et l’autre nous avons 10cm de clearance. Donc un radiateur 60mm est possible mais pas en config push/pull. Ensuite, le panneau latéral. Comme ont peut voir sur une de mes photos, j’y ai insérer un radiateur 60mm d’épaisseur en push/pull. A mon avis c’est génial. Pour finir l’avant. Ça c’est plus compliqué… il vient avec 2 fans 200mm. Si on les retire, ça laisse un gros trou et impossible d’y installer autre que des fans 200mm. Sauf, si on utilise le support de fans qui est au plancher. On installe le support à l’intérieur, à l’avant et ça permet de mettre des fans 120/140mm ou/et un radiateur. Cependant, impossible d’avoir de fans à l’extérieur du boîtier de cette façon donc on se retrouve à prendre plus d’espace à l’intérieur. J’ai essayé de mettre le support à l’extérieur mais comme ont peut voir sur une autre de mes photos, impossible de le sécuriser en place car les trous ne s’alignent pas.☹️ Une autre chose a prendre en compte avec la configuration avant est que si on deplace le support a l’avant, impossible d’installer des fans ou radiateur au fond car il n’y a tout simplement rien pour les fixer.(voir photo) Seule facon serait de modifier la tour avec de nouveaux trous. Très faisable par contre! C’est le seul bémol que j’ai trouvé jusqu’à maintenant.
Tout est possible d’installer sans outils. Même le power supply. Il y a aussi on petit panneau dans le bas de la carte mère qui sert de “shroud” pour cacher le câblage. Très bien comme petit détail à mon avis!
Aussi, pour installer les radiateurs/fans du haut, le tout se retire pour plus de facilité.(voir photo)
C’est à peut près tout. En gros, superbe boîtier que je recommande fortement!
Rhamnetin –
This haf 500 case has good and bad features. The dual 200mm front fans are “haf” blocked by the 120/140mm chassis fan mounts. Airflow will be affected even at full 800rpm. No front intake filter means more dust will enter the case. The perforated mesh is not fine enough to be used as a dust filter. The picture in the ad says it supports 140mm exhaust fan but only 120mm can fit. The gpu swivel fan on top of the hard drive bay seems nice but has no argb. It would have been nice if the hard drive bay had a cover. The removable plastic psu shroud is nice for those who want to show their high end psu or have air intake from the inside of the case to help with airflow. The 200mm fans has a slight wobble at any speed. It’s a nice big case but the small fan mounts on the front ruined the potential high airflow. This is basically an old case back from 2010 that has rgb lighting and a glass side panel to make it look modern.
Rhamnetin –
I chose this case based on Linus’ and TechPowerUp’s reviews because I dislike the process of building PCs and just want a case that makes it as easy as possible, considering my E-ATX motherboard and tendency to use 360mm AIOs (and possibly AIO cooled GPUs in the future). My case before this was the Lian-Li PC-O11D XL, and this absolutely dwarfs it.
Pros:
+ Cable management GOAT – the motherboard area bulges in towards the left side panel, creating a lot more space behind it. In terms of cable management it’s by far the easiest build I have ever done.
+ Fits E-ATX motherboards without sacrificing cable management
+ Excellent airflow out of the box – 2x 200mm front intakes, 2x 120mm rear exhausts, also a disconnected 120mm bottom intake which you shouldn’t use because it’s a sleeve bearing fan which means it won’t last long mounted horizontally down there
+ Bottom fans/radiators install onto a bracket, so that you can install them outside the case. Top fans/radiators can also be installed outside the case by removing that part of the top panel (a structural component though).
+ Overkill levels of water cooling potential
+ Easy tool free installation and removal of front panel, both side panels, and top panel. Like many modern cases, the top panel prevents the side panels from being removed, and it is secured by just one thumbscrew. Side panels are tool-free, and to remove the front panel you just hold a latch on the bottom and then pull it off.
+ Ample front connectivity
+ Best expansion card installation I’ve ever come across in 15 years of PC building. In just about every other case I’ve used, including various Lian-Li models, there’s slight misalignment with the screw holes when installing a graphics card. The HAF 700 omits screws in favor of a big brute force clamp which holds my RTX 4090 just fine.
+ Tool free PSU installation, easy 2.5″ drive installation (and presumably 3.5″ in that cage, didn’t check), and can hold tons of drives
+ Vertical GPU support, though I don’t use it
+ Comes with a fantastic PWM fan+ARGB controller. The fan connections are all PWM, each one has an ARGB connector, and it supports 7 or so fans! It connects to a PWM motherboard header and SATA power. This powers all my fans except for my CPU fans.
+ Despite the size it’s not heavy because it’s mostly plastic
Cons:
– So big but there’s nowhere to really grab it by and no casters, so I basically have to waddle it about because I have short t-rex arms
– In typical HAF fashion, there’s no front dust filter. This is the only source of intake and it’s unfiltered. I stuck a Demciflex magnetic filter inside the front panel, but there are some gaps. Good enough.
– Accessing the bottom dust filter requires removing the left side panel, which requires removing the top panel
– Expansion slot covers use tiny flathead screws that require a long skinny screwdriver to reach, which I didn’t have in my toolbox. They should have used something more standard here.
– Flimsy cable grommet installation – my 24-pin ATX cable pushed one of the rubber grommets clean off and it’s a pain to get back on, this never happened to me in a case before
– Not really a con but you cannot fit Noctua 200mm fans in place of these front 200mm fans. The Noctuas are too thick.
Metro –
Ta weno, muy buen espacio dentro y por detrás para una mejor manejo en la gestión de cables.
Un diseño muy atractivo, más los añadidos de argb que puse quedó pirrurris.
Un pero que pondría es el panel frontal pensaba que sería cristal al igual que el lateral pero no lo es , es acrílico así que mucho ojo para cuidarlo de rayones.
Otro punto malo en mi caso es los ventis frontales, en mi gabinete vino uno con un pequeño ruido que no le logrado determinar cómo quitarlo, es muy tenue pero cuando estás en silencio se nota y es muy quisquilloso.
Cuestión de flujo de aire es lo que uno esperaría, almenos en mi caso baje mínimo 10° de mi gabinete anterior